
The Best Homemade Sushi Recipe

I finally decided to take the plunge and make sushi myself at home. With the right tools, sushi is surprisingly straightforward to make. There’s also a much simpler version of sushi called nigiri for those of you who don’t feel like buying a sushi mat at home. I got all my supplies at my local Asian Market (shout out to H Mart!)
You can make sushi as simple or as complex as you’d like! Mario and I, as natural born foodies, like to level up whenever possible. We thought of some of our favorites sushi rolls and tried to deconstruct them in our heads to figure out what we needed. All in all - it was a success!
Things to keep in mind:
Be careful not to over purchase the fish! Sushi grade fish only lasts 1-2 days in the refrigerator and should be eaten, or frozen for later use, as soon as possible
If the fish seems slimy, with a strong fishy smell, or tastes funky... throw it out! Don’t risk getting food poisoning
It’s best to keep raw fish in the fridge until ready to serve. After I sliced the fish up, I put it back in the fridge until ready to assemble. Proper temperature of raw fish for food safety is <41 F 🌡
Don’t feel ambitious enough for sushi rolls? You can also make nigiri 👉🏻🍣! It’s literally a oval ball of sushi rice with a slice of fish on top. No sushi mat required... just your hands! You can even cut the nori into a thin “ribbon” and wrap it around the nigiri for a pretty finishing touch


Homemade Sushi Recipe
Ingredients
Instructions
- Measure 2 cups of uncooked rice and rinse with cold water, then drain. Rinse and repeat until water runs clear
- Put rice into a medium sized pot (or rice cooker if you have one) and fill pot with cold water until just covering rice (about 1/4 inch above rice)
- Place on stove with high heat until water starts to boil, the lower temperature to medium low until water is fully absorbed/evaporated
- Transfer cooked rice to a large bowl. Pour 5 tbsp of sushi rice vinegar in the bowl and use your rice paddle to evenly incorporate it throughout while also allowing the rice to cool
- Once cooled, cover with a damp paper towel or cloth to prevent it from drying out. Set aside. This yields roughly 2 rolls worth of rice (depending on how much rice you like in your roll). Any extra can be used for nigiri!
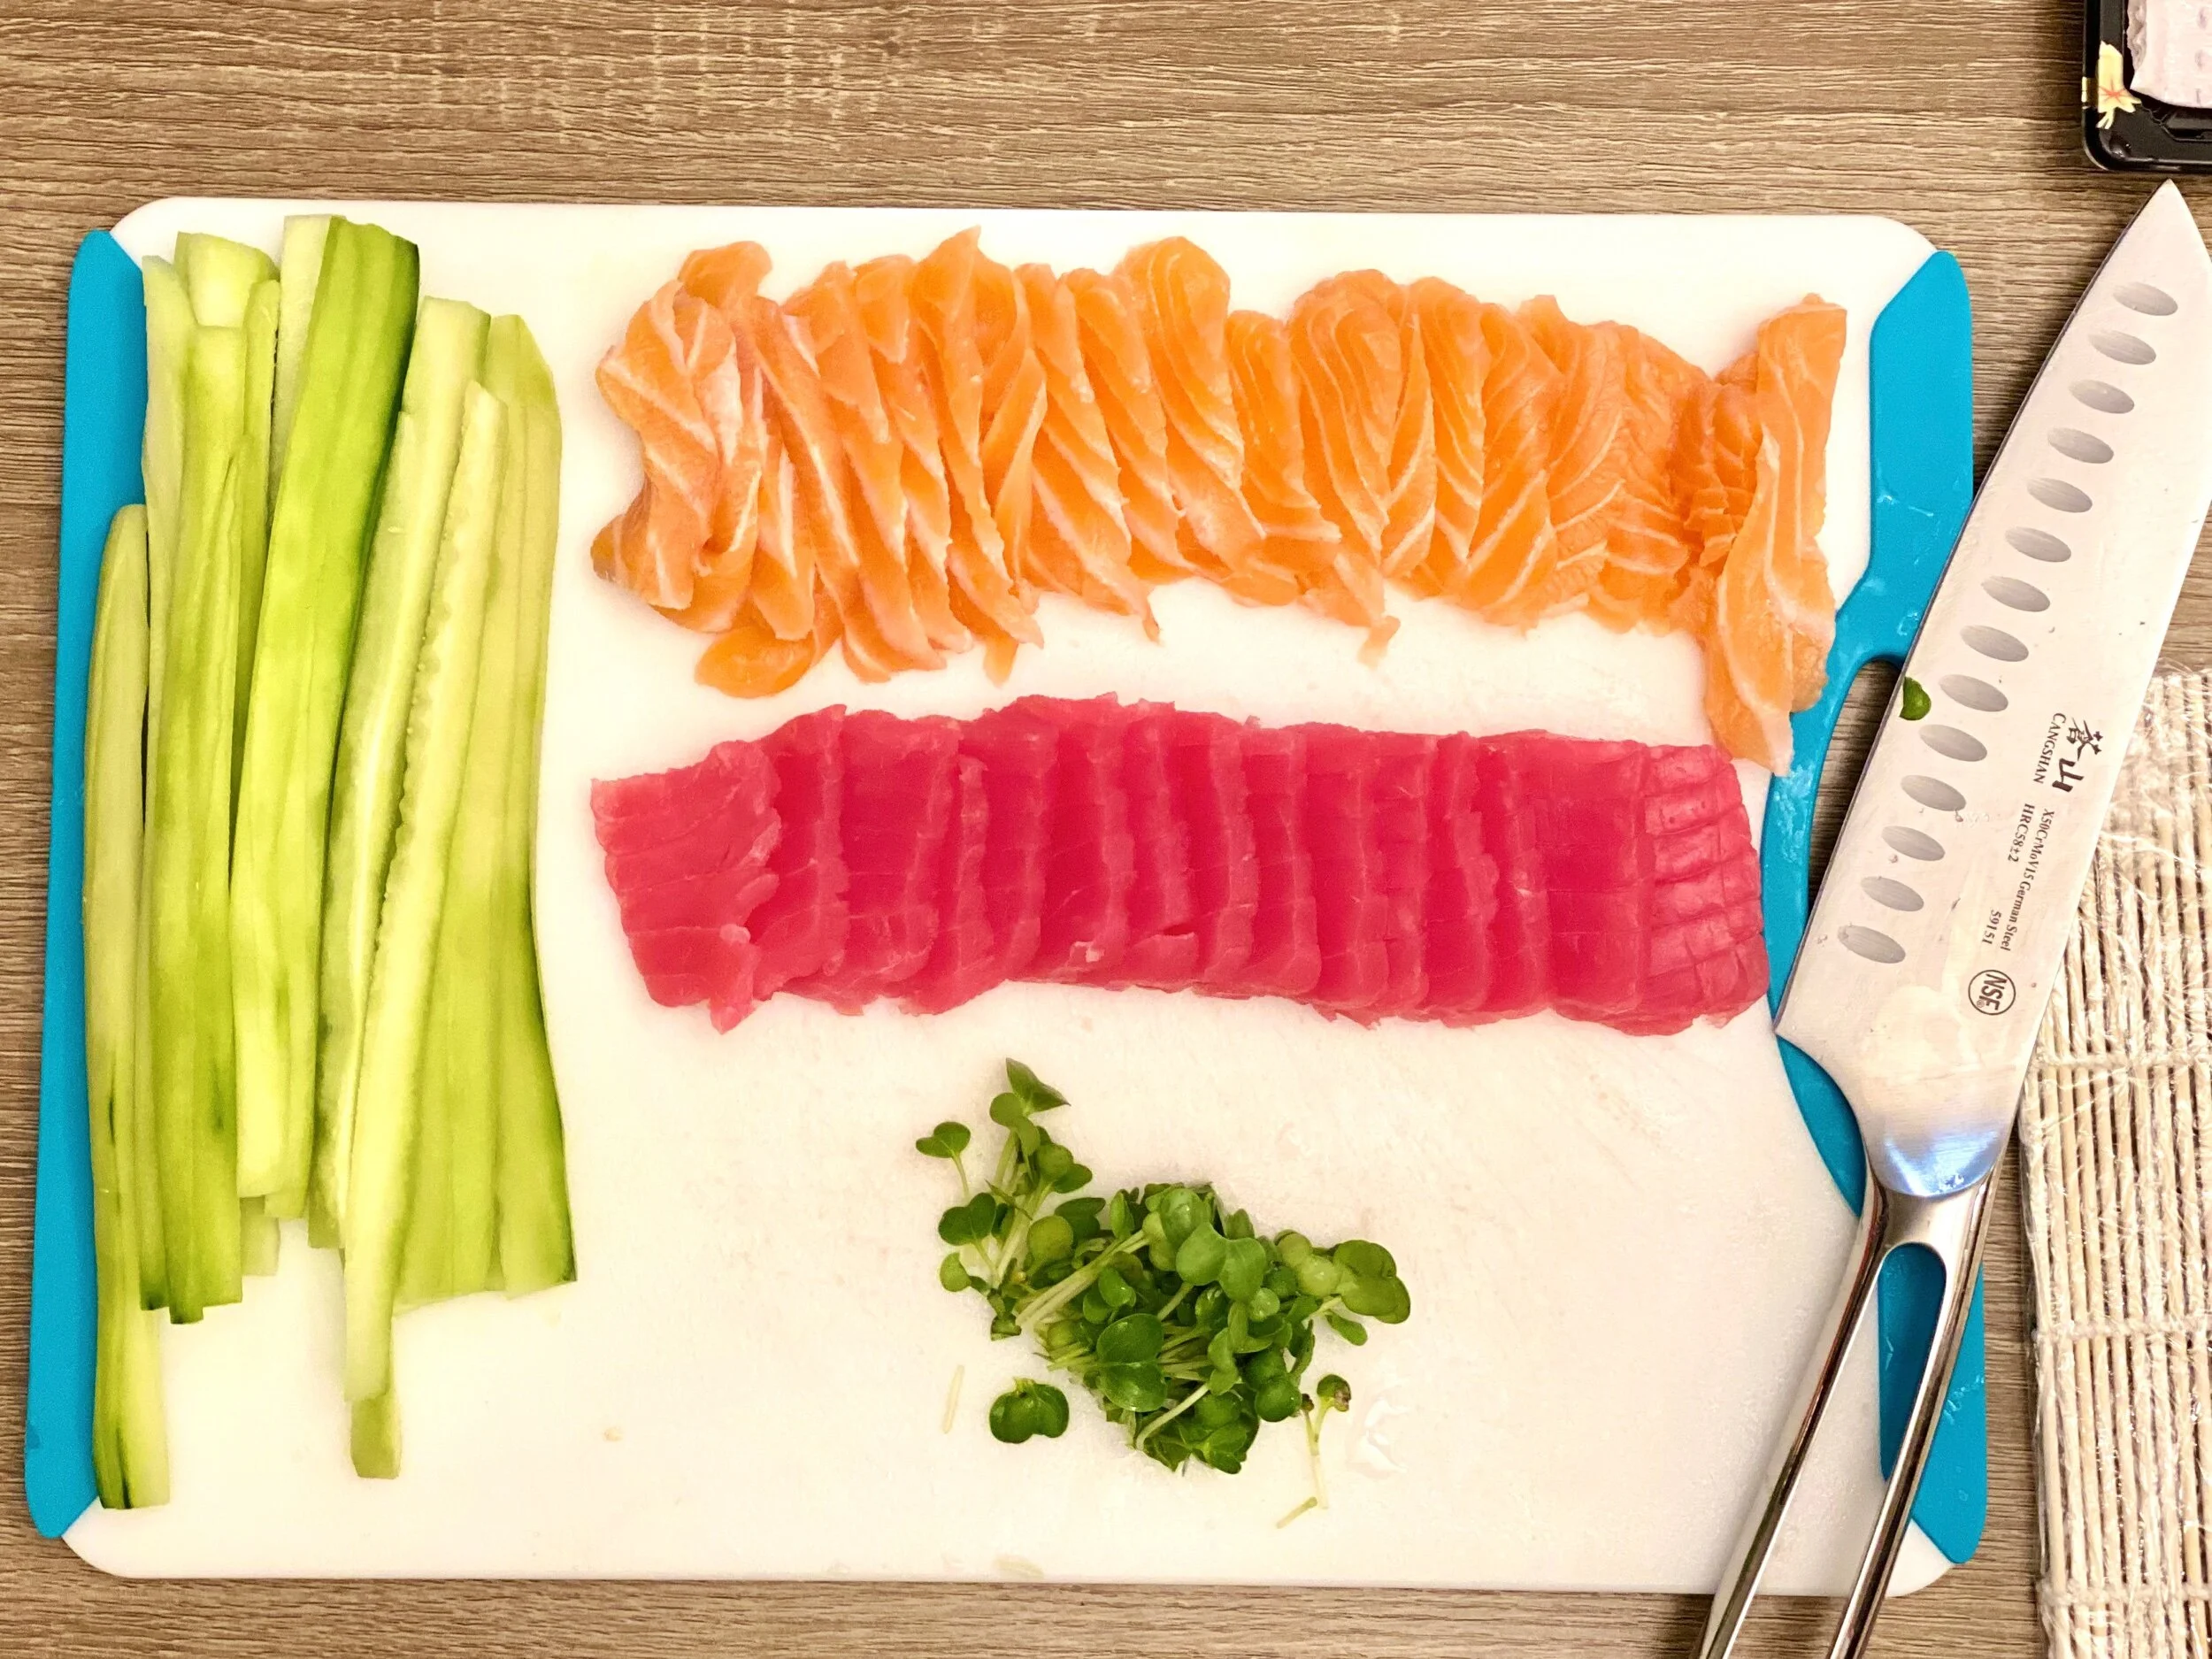
- Wash and peel the cucumber. Cut into long match stick slices, discarding (or eating lol) the seeds
- Cut fish into thin slices. Slice immitation crab into long match stick slices. If you want to go the extra mile, you can shred the immitation crab and mix mayo or sriracha mayo to use as your filling
- Cut avocado in half and discard put. Each half is about 1 roll’s worth if you’re putting on top. Carefully peel off skin (don’t damage the avocado) and cut into thin slices
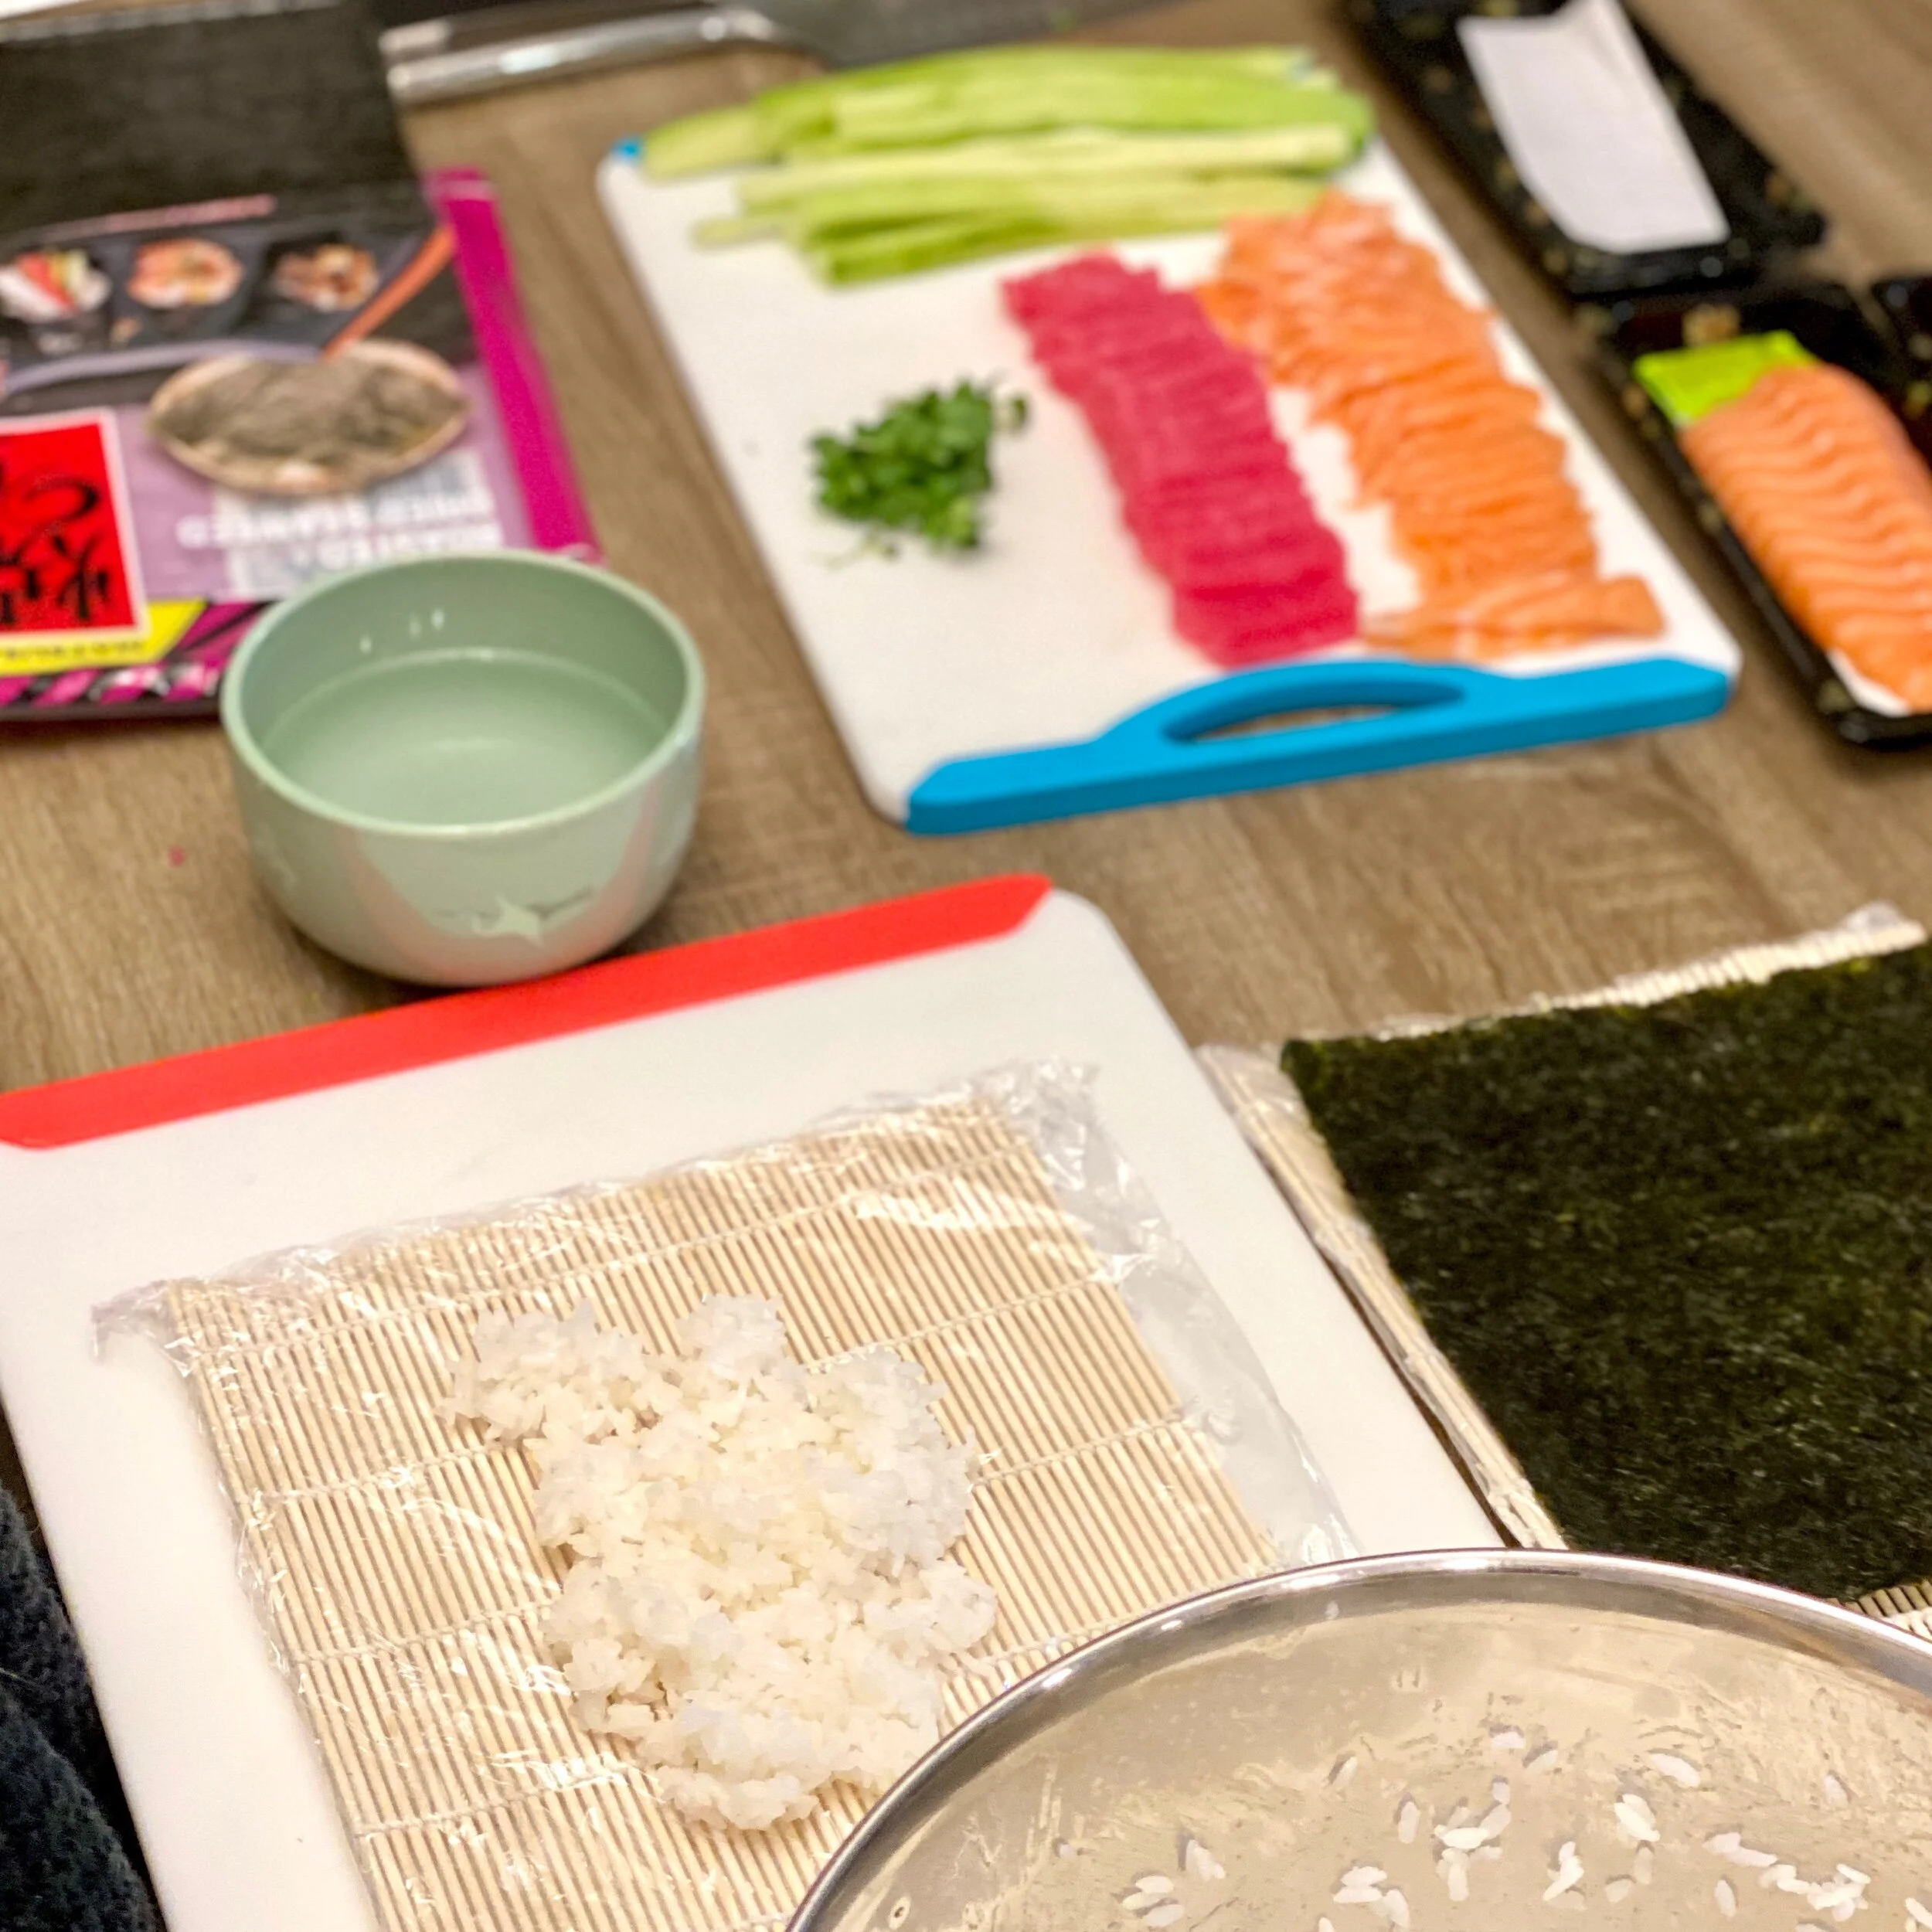
- Wrap the sushi mat in Saran Wrap or silicone sheet. Scoop cooled rice onto mat and use fingers to spread rice into thin layer (pro tip: dip your fingers into a bowl of water next to you before flattening out rice. It’ll help you from getting sticky rice all over your hands)
- Lay the sheet of nori on top of the rice (rough side in contact with the rice) and gently press down to seal the two layers together
- On the edge closest to you, place your fillings of choice across the nori. Our first role had plain immitation crab & cucumber. The second one had tuna, cucumber, sprouts, and cream cheese
- Here comes the fun part. From the edge closest to you, begin rolling the sushi mat over all your fillings until the edge of the rice and nori seals the fillings inside
- Press your fingers in the middle of the mat and slide your hands across to tighten the roll
- Lift the edge of the sushi mat off of the rice you just rolled over, and turn the rice again until the roll is completely formed. Repeat the sealing process to make sure the roll is nice and tight
- Lay out toppings of choice as desired. If topping with fish and/or avocado, lay each slice of fish and/or avocado across the roll, then use the sushi mat again to seal the toppings to the top of the roll
- Before topping with wet ingredients (i.e. mayo, unagi, tobiko) or garnish, use a sharp knife to slice the roll into evenly thick pieces (about 1/2 inch apart) then transfer to serving plate
- If you’d like: drizzle with spicy mayo and unagi sauce. Sprinkle sesame seeds and/or furakake on top
- Serve with side of soy sauce (we like to mix in wasabi for a nice kick), pickled ginger, and other sides as desired


Hi There!
My name is Allison, and I’m a registered dietitian offering nutrition counseling for people looking to optimize their nutrition through a non-diet, intuitive eating approach — meaning I will NEVER have you counting calories or make you restrict foods or food groups. Instead, my goal is to help you feel confident in choosing foods and eating habits that help you feel your best. This includes being able to understand your hunger and fullness cues, giving yourself permission to eat foods you enjoy, and ditching toxic diet culture.
Whether you are managing chronic conditions such as high blood pressure or diabetes, or simply looking for guidance on how to break the cycle of dieting and build a better relationship with food, weight-neutral nutrition therapy can help you to make peace with food and have you live your best life!